在 ubuntu 上 vscode 的 jupyter 扩展的步骤
1. 在 ubuntu 上安装 vscode
我们在 ubuntu 系统上必须拥有的第一件事是 vs code 在我们的系统上的可用性,如果您还没有,请查看本教程。
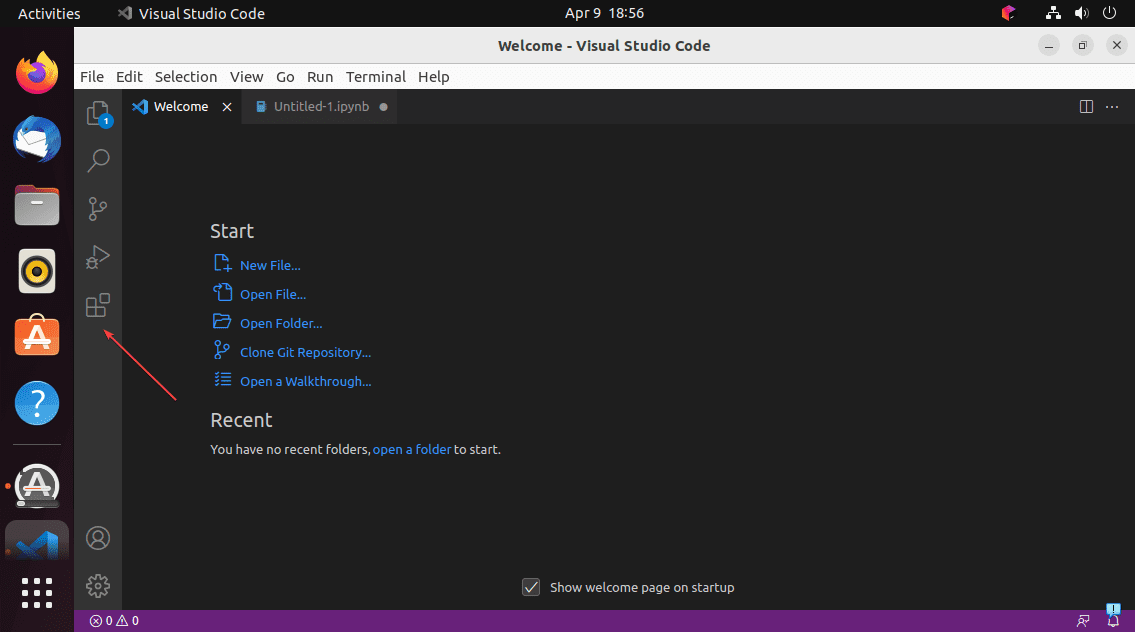
2. 打开扩展面板
在 ubuntu linux 上安装 vscode 后,运行它并单击左侧给出的图标以打开“扩展”面板或使用键盘快捷键 – ctrl shift x。
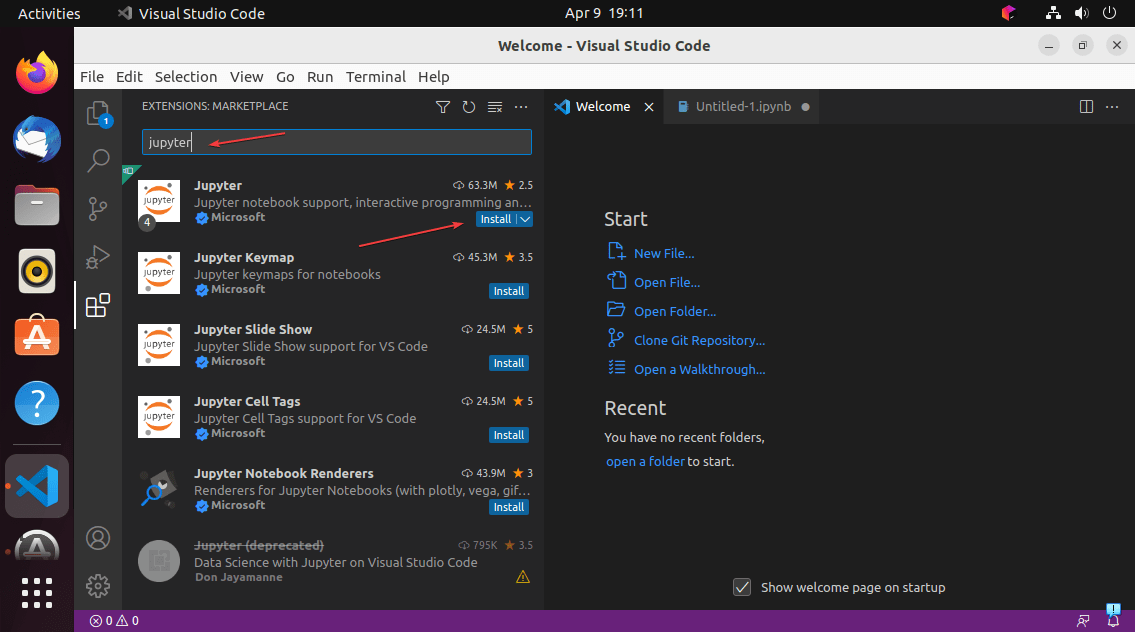
3. 安装适用于 vscode 的 jupyter notebook 扩展
当“扩展”面板打开时,转到“搜索”框,然后键入 – jupyter。很快,在搜索结果中,您将看到在 ubuntu linux 上安装适用于 vscode 的可用 jupyter 扩展的选项。单击该按钮,然后再次安装扩展程序。
注意:此外,以同样的方式安装 python 扩展以有效地编写代码。
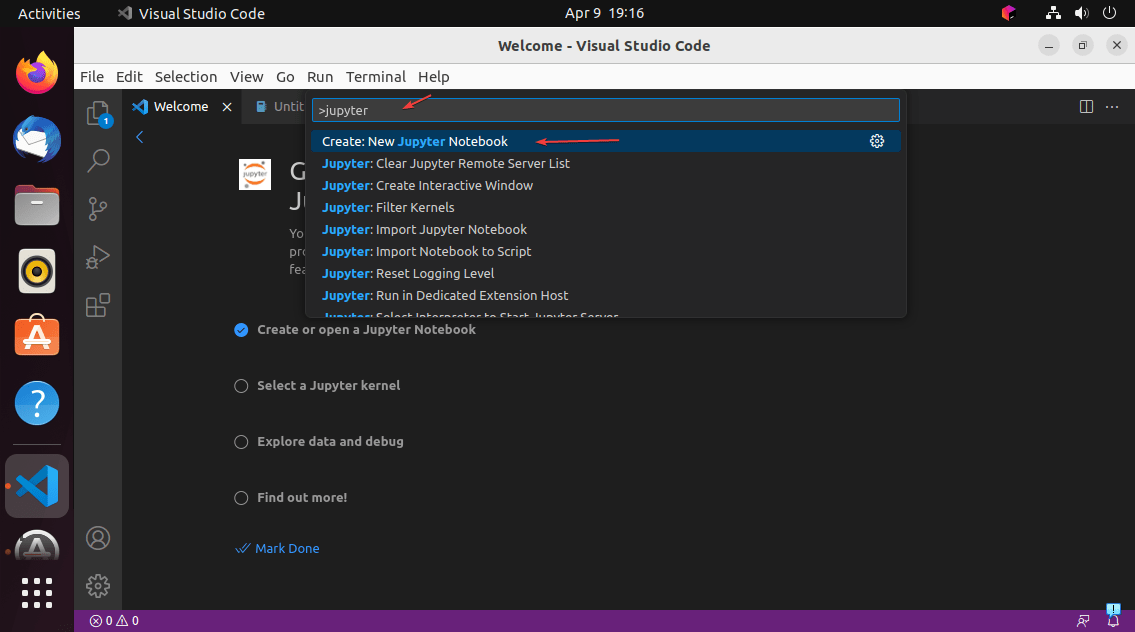
4. jupyter:创建一个新的空白笔记本
安装扩展后,可以通过搜索 jupyter 并单击命令面板中的“创建新的空白笔记本”命令来打开 jupyter 笔记本。要打开调色板,您可以使用快捷键 – ctrl shift p。
5. 选择内核版本
jupyter 内核是一个运行时环境,它为 jupyter notebook 应用程序提供编程语言支持;允许它直接从界面运行在 notebook 上编写的代码。例如,ipykernel 是建立在 ipython 之上的参考 jupyter 内核,为 python 中的交互式计算提供了强大的环境。使用内核用户可以在不离开 vscode 界面的情况下使用 notebook 执行他们的 python 程序。
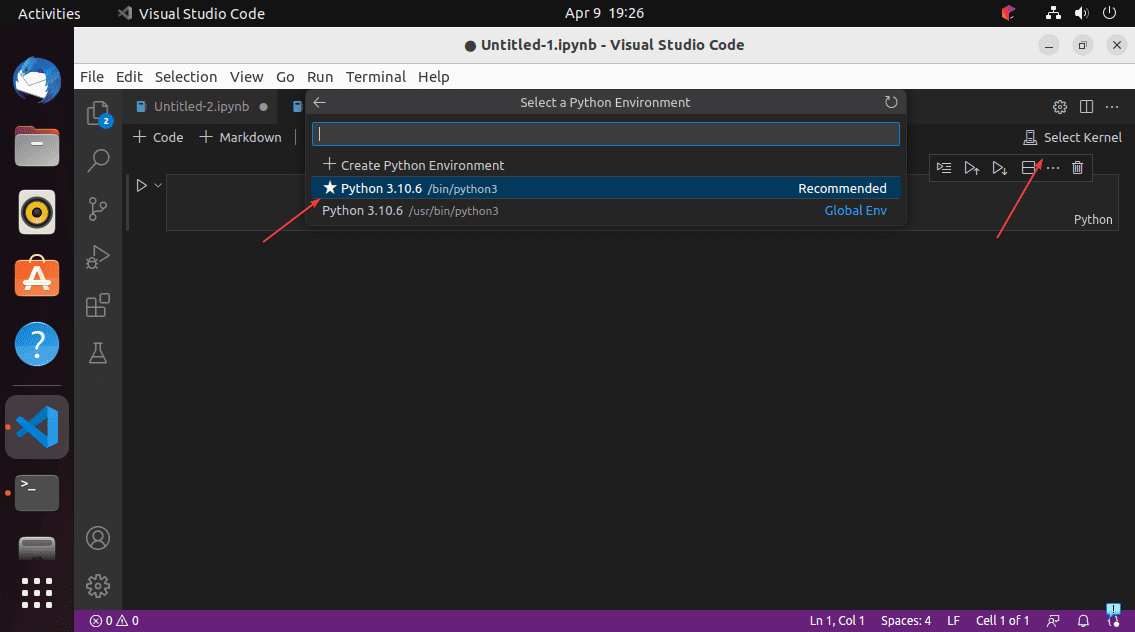
要选择它,请单击编辑器显示屏右侧给出的“选择内核”按钮。之后,在搜索框中键入 python,然后选择要使用的系统上安装的版本。
6. 运行 python 代码
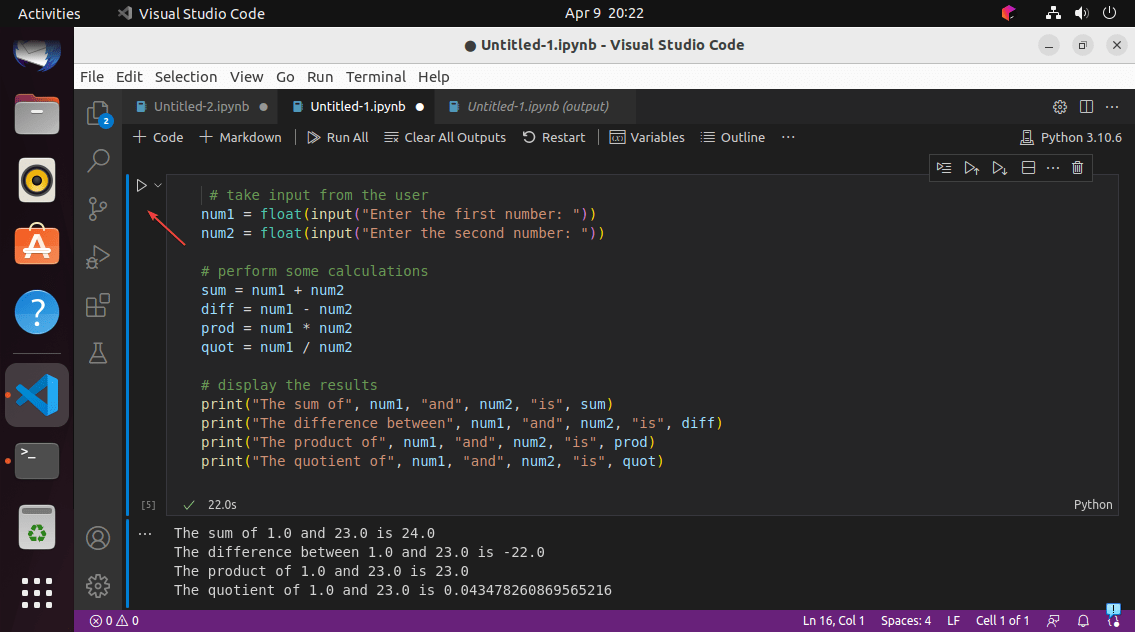
编写或粘贴要在 jupyter notebook 上运行的 python 代码,然后单击“播放”图标以执行它。
总体而言,带有 vscode 的 ubuntu 中的 jupyter notebook 为数据科学开发人员和科学计算提供了一个强大而灵活的环境。借助适用于 vscode 的 jupyter 扩展,您可以利用这两个工具的丰富功能来无缝创建、编辑和共享笔记本。
原创文章,作者:校长,如若转载,请注明出处:https://www.yundongfang.com/yun289054.html
 微信扫一扫不于多少!
  支付宝扫一扫礼轻情意重

